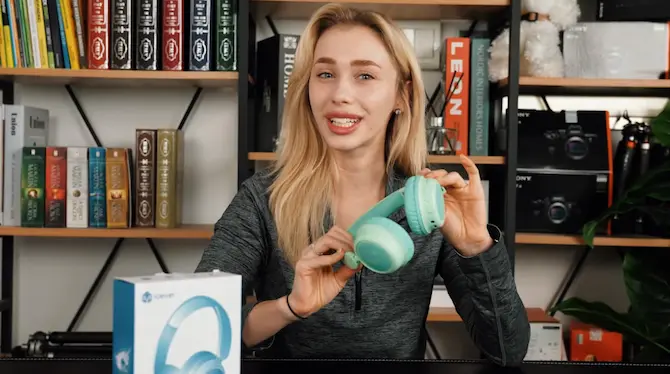
How to Film an Unboxing Review Video
Trying to film your first unboxing video but not sure where to get started?
Don’t worry—no matter the scale of your budget, setup, or access to resources, your voice as a content creator and product reviewer is valuable.
That’s because both consumers contemplating purchasing a product and the companies looking to sell products online need influencers of all different walks of life to review their products.
But no matter how big or small your studio is, there are things that need to be taken care of and done well to get the best results. In today’s article, we’ll give you some tips to get started on your first unboxing video and look into how to maximize your set for the best possible review video.
Figure Out Your Set
Your set is where the magic happens. In other words, this is where everything is filmed. Most of us are familiar with the idea of a professional film set, but a set can be literally anywhere… The corner of your office, your living room, or even your bedroom can all be suitable sets. Don’t feel restricted by a small budget or a lack of space: just pick a spot and do it!
Once you’ve figured out where your set will be, make sure everything in the background is organized and appealing. Feel free to use things like books, potted plants and framed pictures to make the set look pretty. If you don’t have a lot of books on you, prop books are easy to come by and surprisingly cheap, so don’t be afraid to get some of these.
And this should go without saying, but make sure everything is CLEAN! People in the comments will bring up how dirty your mirror is, the dust bunny in the corner, etc.
As for lighting, when you’re just starting out, we recommend starting with what you know works best for you.
Most of us in the social media age have a good sense of what lighting looks good on us. If you’re not sure, consider whatever lighting options you have that can give you a well-lit background and an even blend of light. Once you’re ready to invest in your studio, 200 dollars or so combined with some household items like mirrors and curtains can do a lot of work for you.
Find a Product
Every company needs people to review their products. While it might seem like a good idea at first to try to review popular products from big companies, these products get lots of reviews organically and the companies aren’t going to be too interested in hiring an influencer that’s just starting out.
When looking for products to review, try getting involved in Amazon Vine or looking around Kickstarter for campaigns in need of reviews. These are great ways to get in contact with small businesses who will be willing to partner with you for a product review.
What’s Your Review Angle?
Once you’ve gotten your product, you need to figure out your angle. Generally, a product unboxing review video will have the following components:
1. Intro
2. Unboxing
3. Product demo
4. Your thoughts (the actual review)
5. Closing
This isn’t set-in-stone by any means. But as a rule of thumb, make sure that you show the inside of the product box and the unboxing process, prove to your viewers that the product works, and share your thoughts on whether the product is worth it.
People will be looking at your video to help them decide whether they will purchase a product, and companies who sponsor your review will be checking your video to see if you’ve represented their product fairly and that your video hit the main points. Generally, the specifics of what the company wants from your review content will be outlined in a contract. But, as a rule, companies are looking for influencer reviews to build social trust and increase sales of their products. So, as long as you can show people that this product does its job well and that it is a worthwhile purchase, then the review will be appreciated by the company.
It is worth noting that you don’t want your video to sound like an ad. Everyone hates ads. You want the unboxing video to be as much of a genuine reflection of your experience of the product as possible. And most of the time, companies make products that are worth buying. So, be fair and leverage your individual background and expertise to provide insight into the product that will be appreciated by consumers.
Whatever your angle is, once you’ve solidified your perspective and know what you want to say, all that’s left is to edit the footage and create your video.
Creating Your Video
Now all that’s left is create and edit your video. Final Cut is great if you have a Mac, otherwise consider free tools like DaVinci Resolve or more professional software such as Adobe Premiere Pro.
When editing your video, captions and title cards are quick and effective improvements you can make to your video when just starting out. If you have somewhat of a budget and multiple cameras, switching between a variety of angles in your footage is a good way to keep your audience’s interest. For the final video, structure it around the aforementioned 5 main parts of a review video, making sure each part is occupying enough time. For specific tips and tricks with your specific editing software, Google and YouTube tutorials are your friend here.
Not much else to say about this part; once you’ve got the parts of your video filmed, all that’s left is to sit down and put it together! If it’s hard or time consuming at first, don’t worry, you’ll get the hang of it.
That about covers it for today’s article. But There’s so much more to talk about for making a good review video. If you’re looking for a detailed reference, be sure to check out our unboxing reviews and the Cool Gadgets YouTube channel for more.